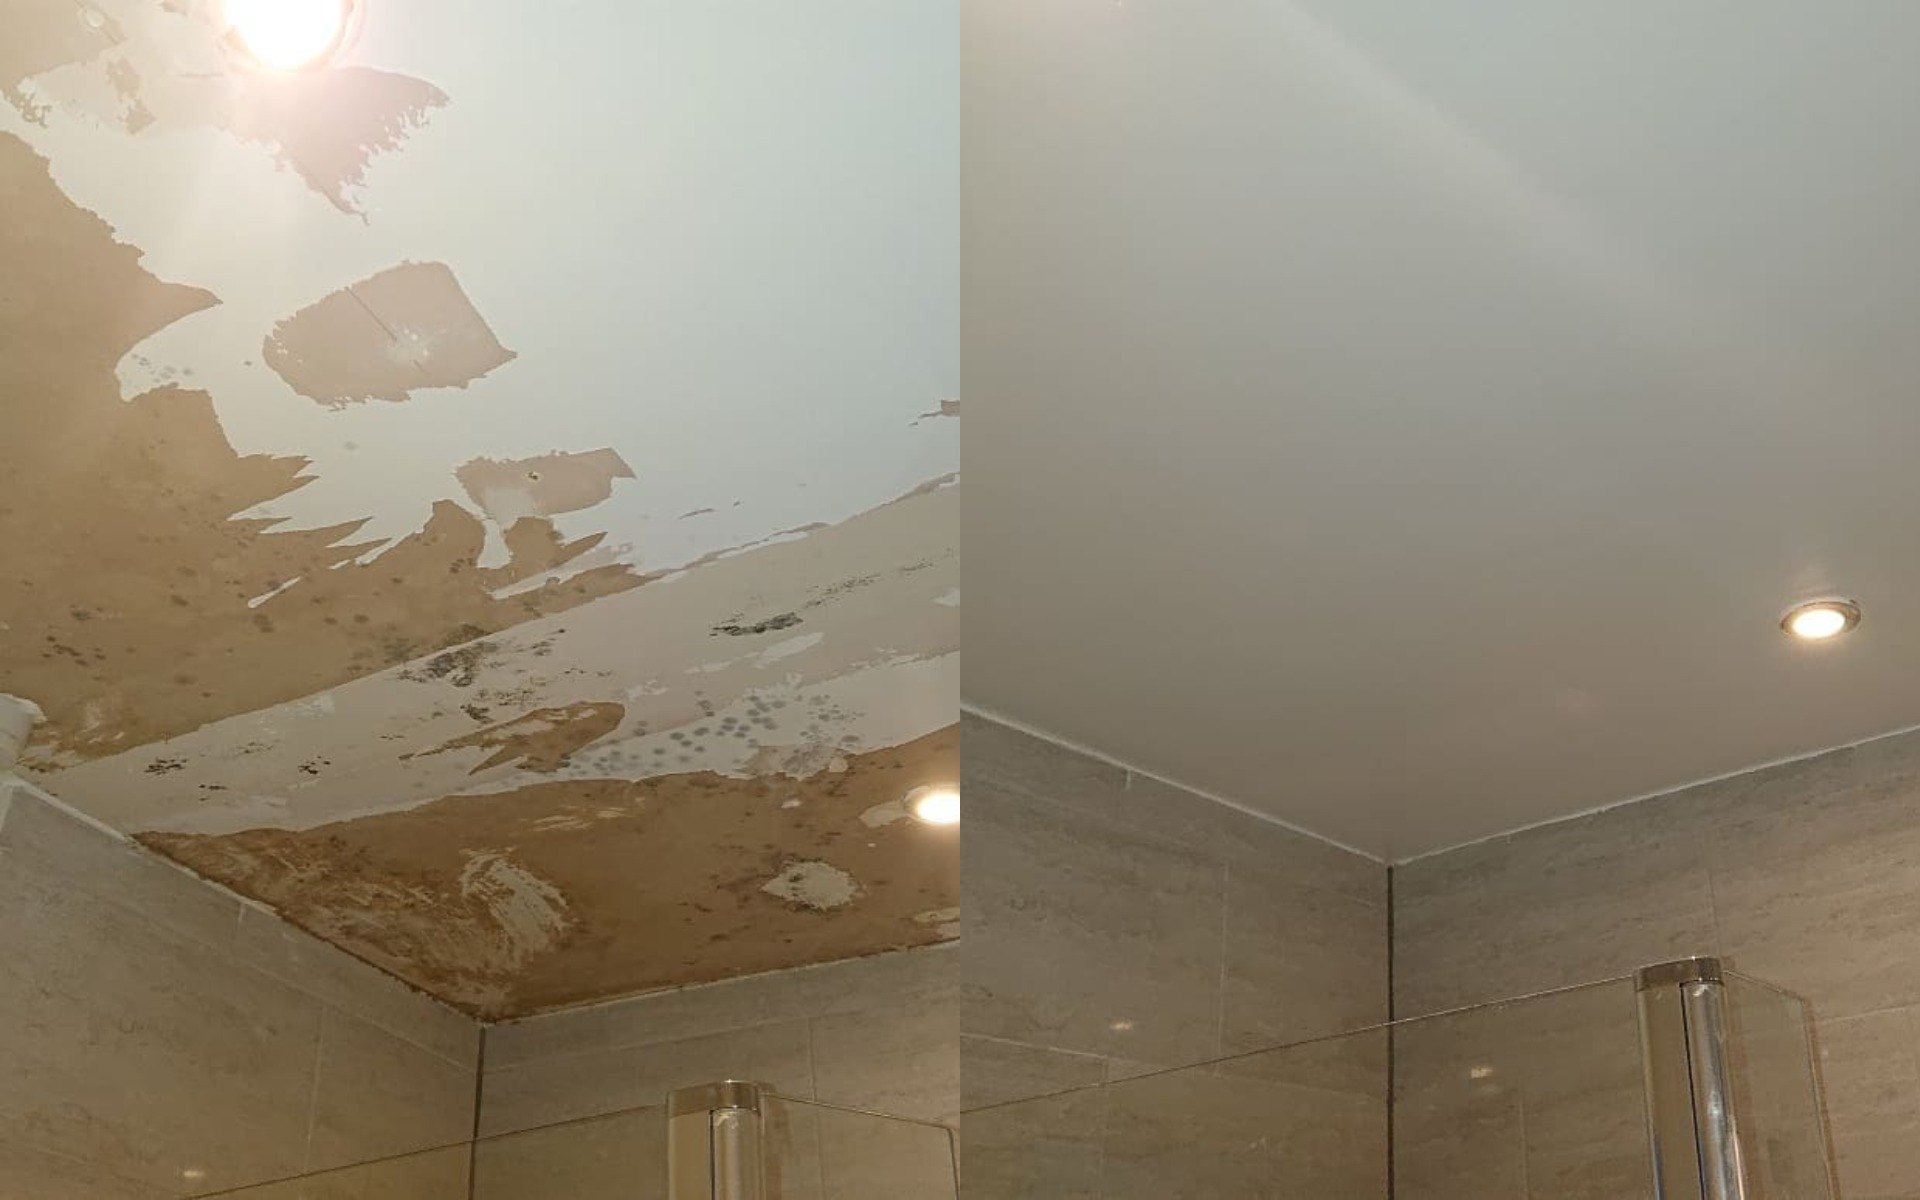
Causes of Bathroom Ceiling Paint Bubbling and Peeling
A bathroom ceiling, with its constant exposure to moisture, is a prime location for paint problems. When the paint starts to bubble and peel, it’s a clear sign that something’s amiss. Understanding the underlying causes is crucial for addressing the issue effectively and preventing future problems.
Moisture and Condensation
Moisture and condensation are the most common culprits behind bathroom ceiling paint issues. The high humidity levels, generated by showers, baths, and even everyday activities like washing hands, can create a breeding ground for moisture problems. This excess moisture can seep into the ceiling, leading to paint bubbling and peeling.
- High Humidity: Bathrooms are naturally humid environments. The steam from showers and baths, combined with the lack of adequate ventilation, can lead to high humidity levels. This excess moisture can be absorbed by the ceiling materials, causing paint to lift and peel.
- Condensation: When warm, moist air from the bathroom comes into contact with a cooler surface, such as the ceiling, condensation occurs. This moisture can accumulate on the surface, creating a damp environment that encourages mold growth and paint deterioration.
Leaks
Leaks, whether from plumbing fixtures or the roof, can also cause paint to bubble and peel. Leaking pipes or a leaky roof can create a constant source of moisture, saturating the ceiling and leading to paint failure. The presence of water stains on the ceiling is a clear indication of a leak.
- Plumbing Leaks: Leaky pipes, faucets, or showerheads can lead to persistent moisture accumulation on the ceiling. This can weaken the paint adhesion, causing it to bubble and peel.
- Roof Leaks: A leaky roof can allow rain or snow to seep into the attic and eventually into the bathroom ceiling. This can cause significant water damage, leading to paint peeling and even structural issues.
Poor Ventilation
Proper ventilation is crucial for maintaining a healthy bathroom environment and preventing paint problems. Insufficient ventilation allows moisture to build up, leading to condensation and paint deterioration.
- Lack of Exhaust Fan: A bathroom exhaust fan is essential for removing excess moisture from the air. Without a fan, or with a malfunctioning fan, moisture can easily condense on the ceiling, causing paint problems.
- Inadequate Fan Size: An exhaust fan that is too small for the size of the bathroom may not be able to effectively remove moisture. This can lead to moisture buildup and paint problems.
- Closed Windows: Keeping bathroom windows closed can trap moisture inside, leading to condensation and paint deterioration. Even if an exhaust fan is present, it may not be enough to remove all the moisture if the windows are closed.
Improper Paint Application
Even with proper ventilation and moisture control, improper paint application can lead to paint bubbling and peeling.
- Poor Surface Preparation: If the bathroom ceiling is not properly cleaned and prepared before painting, the paint may not adhere properly. Dirt, grease, or old paint can create a barrier, preventing the new paint from bonding effectively.
- Using the Wrong Type of Paint: Using a paint that is not designed for high-moisture environments can lead to paint failure. Moisture-resistant paints, such as acrylic latex paints, are specifically formulated to withstand the challenges of a bathroom environment.
- Applying Too Many Coats: Applying too many coats of paint can trap moisture, leading to paint bubbling and peeling. It’s important to follow the manufacturer’s instructions for the recommended number of coats.
Troubleshooting and Inspection: Bathroom Ceiling Paint Bubbling And Peeling

Before attempting any repairs, it’s crucial to understand the root cause of the paint bubbling and peeling. A thorough inspection will help pinpoint the source of the moisture and the extent of the damage. This information will guide your repair strategy and ensure a lasting solution.
Identifying Moisture Sources, Bathroom ceiling paint bubbling and peeling
Locating the source of moisture is the first step in resolving the problem. This involves a systematic approach, examining various potential culprits.
- Leaky Pipes: Check for any visible leaks in pipes, particularly those located above the bathroom ceiling. This could include dripping pipes, corroded pipes, or loose connections.
- Faulty Plumbing Fixtures: Inspect plumbing fixtures like faucets, showerheads, and toilets for signs of leaks. Pay attention to dripping sounds, damp areas around the fixtures, or water stains on the ceiling.
- Condensation: Condensation can occur on windows, particularly during cold weather or when there is a large temperature difference between the inside and outside. This moisture can seep into the surrounding drywall and cause paint problems.
- Roof Leaks: If the bathroom ceiling is directly under the roof, check for any leaks or damage to the roof itself. This can be a significant source of moisture.
Assessing the Extent of Damage
Once you’ve identified the moisture source, it’s essential to assess the extent of the damage. This involves examining the paint, drywall, and surrounding areas for signs of deterioration.
- Paint: Examine the paint for signs of bubbling, peeling, discoloration, or mold growth. These are all indicators of moisture damage.
- Drywall: Feel the drywall for signs of dampness or softness. If the drywall feels spongy or discolored, it may be damaged and need replacement.
- Surrounding Areas: Check the surrounding areas for signs of water damage, such as warped wood, stained flooring, or mold growth. This can help determine the extent of the problem and guide your repair strategy.
Solutions and Repair

Now that you’ve identified the root cause of the paint bubbling and peeling on your bathroom ceiling, it’s time to roll up your sleeves and tackle the repair. This section will guide you through the process of restoring your ceiling to its former glory, providing you with the tools and techniques you need to achieve a smooth, blemish-free finish.
Repairing Damaged Paint
Repairing damaged paint involves removing the affected areas, cleaning the surface, and applying fresh paint. This process requires patience and attention to detail, ensuring a long-lasting and visually appealing result.
- Scraping off the Damaged Paint: Use a scraper or putty knife to carefully remove the peeling and bubbling paint. Work slowly and gently to avoid damaging the underlying drywall. Be sure to dispose of the scraped paint properly, following local regulations.
- Cleaning the Surface: Once you’ve removed the damaged paint, thoroughly clean the surface with a damp cloth and mild detergent. Allow the surface to dry completely before proceeding to the next step.
- Applying New Paint: Apply a primer to the cleaned surface to create a smooth, even base for the new paint. Allow the primer to dry completely before applying two coats of high-quality, moisture-resistant paint. Use a paint roller for a smooth finish and a brush for corners and edges.
Patching Holes and Cracks
If the paint bubbling and peeling have exposed holes or cracks in the drywall, you’ll need to patch them before applying new paint. This process involves filling the holes with patching compound, sanding for a smooth finish, and priming the patched area before painting.
- Applying Patching Compound: Use a putty knife to apply patching compound to the holes or cracks, pressing it firmly into the damaged area. Smooth the compound to create a level surface with the surrounding drywall.
- Sanding for a Smooth Finish: Once the patching compound has dried, sand the patched area with fine-grit sandpaper to create a smooth, even surface. This step is crucial for ensuring a seamless finish after painting.
- Priming the Patched Area: Before applying new paint, prime the patched area to create a bond between the new paint and the patching compound. Allow the primer to dry completely before applying two coats of high-quality, moisture-resistant paint.
Addressing the Underlying Cause
It’s important to remember that simply repairing the damaged paint won’t solve the problem if the underlying cause of the bubbling and peeling isn’t addressed. Here are some common causes and their solutions:
- Leaks: If the paint bubbling and peeling are caused by a leak, you’ll need to locate and repair the source of the leak. This may involve hiring a plumber or roofer to address the issue.
- Poor Ventilation: A lack of ventilation in the bathroom can lead to moisture buildup, causing paint to bubble and peel. Ensure adequate ventilation by using an exhaust fan or opening a window when showering or bathing.
- Moisture-Resistant Materials: Using moisture-resistant materials, such as mildew-resistant paint and drywall, can help prevent paint bubbling and peeling in high-moisture environments. Consider using these materials during any future renovations or repairs.
